Considerations.
1) The application requires access to 3rd party dlls namely the charting dll (zedGraph) , a XMLSecurities.xml file and XMLDefaultPreferences file which should
reside in the same location as the exe.
The XMLDefaultPreferences.XML file stores user defaults such as default instrument to auto load on startup (if operating in Demo or Live mode), Rss feeds etc.
There is a XMLSecurities.XML file which stores all tradeable instruments currently available on the LMAX exchange. It would be preferable to make a webservice
call and be returned all instruments. For now however I have placed the items in there own XML file.
2) ** The application has been written to allow the outputting of data to a csv file. It should be noted that under XP writing to any directory location was
allowed by the windows operating system. However under Vista and Win7 this is no longer the case. When writing out files the output must be directed
to the folder in which the exe is located. NAS drives or network drives may encounter extra permissions issues. Another consideration is the amount of
data that needs to be written. At particularly busy times this may slow down performance of the system. Note this feature has NOT been fully tested
you may experience "issues". My recommendation at this time is not to write out data.
3) Screen resolution of 1920 x 1080.
Using the LMAX Client.
1) Upon running the application you should be presented with the following login screen.

The username is hidden with a series of hases (e.g. #######) and the pasword is hidden with asterisks (e.g. ***************). Enter your Username and
Password for the account you wish to enter. Once the fields have been populated select the appropriate account and "Click" the login button.
NOTE hitting enter will not work. The user has to make a positive action of clicking the login button.
The account (Username, Password) validation is performed against LMAX's servers. No Password data is stored locally. Username is stored on the
client to log changes to the XMLDefaultsPreferences.XML file. If you prefer not to store this information I suggest defining the username parameter to an empty string.
To facilitate this change :
in frmLogin.cs find the following line :
frmLMAXMain frMain = new frmLMAXMain(p_strUserName, m_strCookie, -1);
and replace p_strUsername with "". in two locations.
If your Username and password fail validation you will be notified.by the application. The application checks for an OK returned status. If this is not recieved then the
login attempt is considered a fail.
The Replay account does not require a username and password. This is an offline version of the application. So if you wish to update some preferences without logging in to
your LMAX account you can do so. This feature has been designed with historical / offline analysis in mind. Although such functionality isn't currently available.
2) Main Information Screen Overview.
Upon a successful login you will be presented with the following trading screen:
At the top of the screen (top RHS) there is the account idicator i.e. LIVE or DEMO along with the date.

As soon as data is streamed / received the prices should begin to be reflected in the chart. Note the default instrument MUST be set.
You can either edit the XMLDefaultPreferences.xml file directly or you can make the change in the preferences screen (see later).
To automatically scale the grid , with the cursor over the chart, right click the mouse and select "set scale to default". The chart is automatically scaled.
Instrument Selection
Select the appropriate node on the treeview on the LHS of the screen. The treeview expands to display a list of available instruments.

Double click on the selected instrument and full level 2 Price data should be displayed in a price grid at the top of the screen.
Note You can only display one instance of an instrument i.e. you cannot display multiple copies of the same instrument .
Version 0.0.5.7 can only plot price data for ONE instrument which is ALWAYS the default instrument. The price that is plotted is the MID price of
the BEST bid offer spread i.e. the prices that appear at the top of the price grid and which are represented in a colour coded header.
A partially populated 5 items (selected) price / instrument header block.
NOTE:
The price grid timestamp is NOT an exchange timestamp but a local system time.

To close a particular instrument click on the red X (bottom left of each price grid).
To place a trade in a chosen instrument click the M icon (bottom right of each instrument) and a trade ticket is presented to the user thus :

The reason for the M was to distinguish between a manual trade and an automatic trade.
I considered it might be worthwhile having several states with e.g. an A indicating an automatic trade. The params would be defined in the preferences screen and
when clicked a predetermined trade would be executed (maybe something for the next version). This idea coulld be extended such that a sequence of trades in multiple instruments could be initiated at the touch of a button e.g. an emergency trade situation.
RSS Feed
At The bottom of the screen is the RSS feeds display. The feeds are NOT clickable. They are simple headline feeds. (note Next version may make them clickable)
By default RSS feeds are enabled you can add other feeds if you wush to. In order for the changes to be reflected restart the application.
Orders / Other
Slightly above the RSS feed and below the chart area is the orders section. This section is activated in oneof two ways.
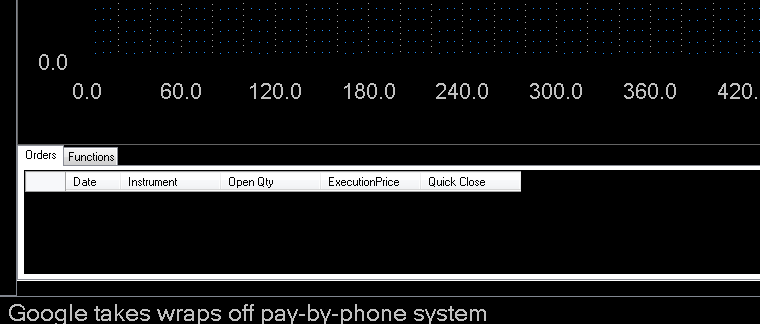
a) Either hover the mouse over the parallel lines or
b) Place a trade in a selected instrument and the section is displayed automatically:
To close this section click on the red button on the lower RHS of the screen just above the RSS feed.
I considered it might be worthwhile having several states with e.g. an A indicating an automatic trade. The params would be defined in the preferences screen and
when clicked a predetermined trade would be executed (maybe something for the next version). This idea coulld be extended such that a sequence of trades in multiple instruments could be initiated at the touch of a button e.g. an emergency trade situation.
RSS Feed
At The bottom of the screen is the RSS feeds display. The feeds are NOT clickable. They are simple headline feeds. (note Next version may make them clickable)
By default RSS feeds are enabled you can add other feeds if you wush to. In order for the changes to be reflected restart the application.
Orders / Other
Slightly above the RSS feed and below the chart area is the orders section. This section is activated in oneof two ways.
a) Either hover the mouse over the parallel lines or
b) Place a trade in a selected instrument and the section is displayed automatically:
To close this section click on the red button on the lower RHS of the screen just above the RSS feed.
This section is currently used to display active order information. Future versions will have extra functionality displayed in this area via extra Tab sections.
Preferenes

The 1st preferences tab allows the user to write out data to a location (see Consideration sec 2 above). The LMAX Client application employs the streaming model i.e.
prices are received in real time as soon as they are generated. If you want to employ a polling model of data aquisition you will have to code the method.
The application requires that a default instrument is chosen you need to enter in the instrument in the same format as exists in the LMAX instrument CSV file. There is no validation on this field so if you are interested in currencies make sure there is no space between the two currencies e.g. EUR / GBP will fail (correct format above)
LMAX provide a csv file of instrument data. This csv file has been converted into an xml file and is read in once the application starts.
a typical section of the XMLSecurities.xml file which can be found in the same location as the build or exe.
<instrument>AUD/JPY</instrument>
<lmaxID>4008</lmaxID>
<lmaxSymbol>AUD/JPY</lmaxSymbol>
<effectiveDate>09/07/2010</effectiveDate>
<expiryDate />
In this version of the application the default instrument field is case sensitive and the data between the instrument tags should be entered in the default instrument field in exactly the same way it appears between the tags.
Display instrument pricing is set at 5 it is my intention to allow the user to define this in a later version. At the moment this param cannot be changed unless a developer wishes
to do so.
Ticket transparency allows the trade ticket form to display information behind it i.e. allows chart info to be displayed through the ticket .

The second tab on the preferences defines the RSS feed. Paste the URL into the RSS URL field and click ADD button. The url shoul appear in the datagrid below. Continue
to add as many feeds as you like.
Trade Ticket
The user can currently place market trades with a profit and stop loss target.
In this version (0.0.5.7) Limit Trades , Stop trades and cancelling of trades has not been implemented.
Click the M icon on the price grid. This inititates a trdae ticket with live BEST bid offer prices at the top of the ticket.
Enter the number of contracts you wish to trade in the quantity field. (Market) is the default option. If you wish to define a profit stop or stop loss position do so by amending
the +- field.
Click buy or sell to execute the trade.
If successful you should be see the orders tab open and your trade should be displayed thus:

to close the position click the Quick close check box and the position should be immediately closed. You can test this functionality in the DEMO account.